UIKit - NavigationController 설정 방법(코드)
UIKit - NavigationController 설정 방법(코드)
NavigationController 설정 방법(코드)
ViewController.swift
1
2
3
4
5
6
7
8
9
10
11
12
13
14
15
16
17
18
19
20
21
22
23
24
25
26
27
28
29
30
31
32
33
34
35
36
37
38
39
40
41
42
43
44
45
46
47
48
49
50
51
52
53
54
55
56
57
58
59
60
61
62
63
64
65
66
67
68
69
70
71
import UIKit
class ViewController: UIViewController {
private lazy var nextBtn: UIButton = {
let btn = UIButton()
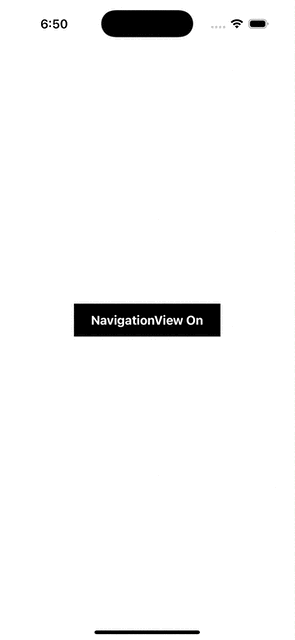
btn.setTitle("NavigationView On", for: .normal)
btn.backgroundColor = .black
btn.setTitleColor(.white, for: .normal)
btn.titleLabel?.font = UIFont.systemFont(ofSize: 17, weight: .bold)
btn.translatesAutoresizingMaskIntoConstraints = false
btn.addTarget(self, action: #selector(nextBtnTapped), for: .touchUpInside)
return btn
}()
// NavigationController 인스턴스 할당
private lazy var navVc: UINavigationController = {
let first = FirstViewController()
// FirstViewController rootViewController로 지정
let navVc = UINavigationController(rootViewController: first)
return navVc
}()
override func viewDidLoad() {
super.viewDidLoad()
makeUI()
// NavigationBar 디자인 설정
let appearance = UINavigationBarAppearance()
appearance.configureWithOpaqueBackground()
appearance.backgroundColor = .white
// 기본 상태에서 네비게이션 바가 표시될 때 적용되는 스타일.
// 보통 화면 상단에서 스크롤하지 않은 상태일 때의 스타일.
// 전역 설정
UINavigationBar.appearance().standardAppearance = appearance
// 스크롤 뷰를 최상단까지 올렸을 때 (큰 타이틀) 적용되는 스타일.
// 전역 설정
UINavigationBar.appearance().scrollEdgeAppearance = appearance
// Compact 높이에서 (예: iPhone 가로 모드, CallKit 화면 등) 네비게이션 바 스타일.
// 전역 설정
UINavigationBar.appearance().compactAppearance = appearance
}
func makeUI(){
self.view.addSubview(nextBtn)
NSLayoutConstraint.activate([
nextBtn.centerXAnchor.constraint(equalTo: self.view.centerXAnchor),
nextBtn.centerYAnchor.constraint(equalTo: self.view.centerYAnchor),
nextBtn.widthAnchor.constraint(equalToConstant: 200),
nextBtn.heightAnchor.constraint(equalToConstant: 45)
])
}
@objc func nextBtnTapped(){
navVc.modalPresentationStyle = .fullScreen
// present 형태로 NavigationController를 띄움
present(navVc, animated: true)
}
}
FirstViewController.swift
1
2
3
4
5
6
7
8
9
10
11
12
13
14
15
16
17
18
19
20
21
22
23
24
25
26
27
28
29
30
31
32
33
34
35
36
37
38
39
40
41
42
43
44
45
46
47
48
49
50
51
import UIKit

class FirstViewController: UIViewController {

    private lazy var nextBtn: UIButton = {
        let btn = UIButton()

        btn.setTitle("다음으로", for: .normal)
        btn.backgroundColor = .black
        btn.setTitleColor(.white, for: .normal)
        btn.titleLabel?.font = UIFont.systemFont(ofSize: 17, weight: .bold)

        btn.translatesAutoresizingMaskIntoConstraints = false

        btn.addTarget(self, action: #selector(nextBtnTapped), for: .touchUpInside)

        return btn
    }()

    override func viewDidLoad() {
        super.viewDidLoad()

        // NavigationController 타이틀 설정
        self.title = "첫화면"

        // largeTitle 설정
        navigationController?.navigationBar.prefersLargeTitles = true
        navigationItem.largeTitleDisplayMode = .always

        self.view.backgroundColor = .red
        makeUI()
    }

    func makeUI(){
        self.view.addSubview(nextBtn)

        NSLayoutConstraint.activate([
            nextBtn.centerXAnchor.constraint(equalTo: self.view.centerXAnchor),
            nextBtn.centerYAnchor.constraint(equalTo: self.view.centerYAnchor),
            nextBtn.widthAnchor.constraint(equalToConstant: 120),
            nextBtn.heightAnchor.constraint(equalToConstant: 45)
        ])
    }

    @objc func nextBtnTapped(){
        let secondVc = SecondViewController()

        // 다음화면으로 push
        self.navigationController?.pushViewController(secondVc, animated: true)
    }
}
SecondViewController.swift
1
2
3
4
5
6
7
8
9
10
11
12
13
14
import UIKit

class SecondViewController: UIViewController {

    override func viewDidLoad() {
        super.viewDidLoad()

        self.view.backgroundColor = .green
        self.title = "두번째"

        // largetTitle 사용하지 않음
        navigationItem.largeTitleDisplayMode = .never
    }
}
결과
This post is licensed under CC BY 4.0 by the author.